Welcome to Brush Tip, a series of blog posts (ed: we had intended to, but didn't get around to it! Are you a painter? Get in touch about submitting a guest blog post!) where we demonstrate how you can use simple techniques and tools to get great battle-ready models!
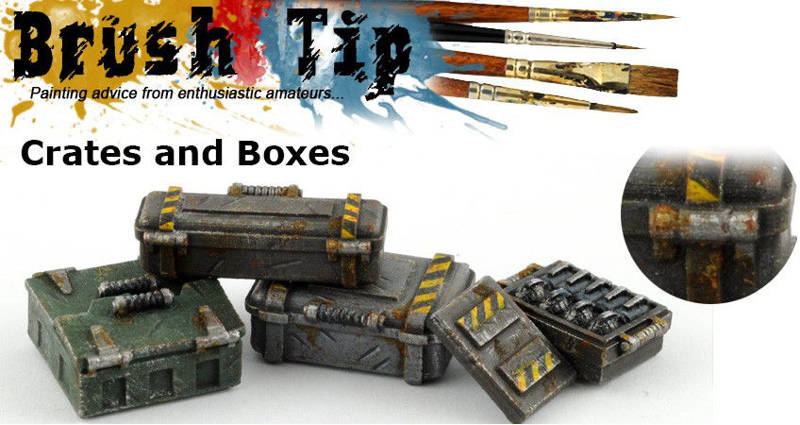
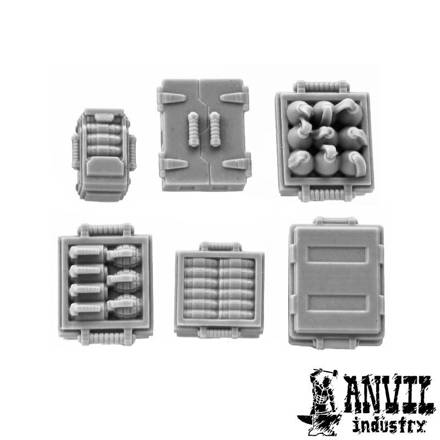
In this article, I’ll be painting up some of our new Crates and Boxes accessory set to get the result you see above!

1. Start with a solid base layer of the main colour you want for each box. Here we use several example military colours to show what’s possible.

2. Apply a two-stage drybrush to highlight all the raised edges and textures. We’ve used a lighter version of the main colour for each box, by mixing in a bit of white paint. Wiping almost all the paint off gets a dry brush, which is then brushed rapidly and lightly over the surface of the box so that paint only hits the raised edges. Start lightly and build it up with several goes over. It's easy to add more, but difficult to remove too much!
The second drybrush is much lighter, and uses pure white for all the boxes, aiming to hit just the very raised sharp edges around the tops.

3. Paint in the details which are not the base colour. We’ve used metallic silver for hinges, and black for handles.
You can also try creating the illusion of chips and scratches in the box surface if you want, this requires a bit of control and a fine brush.
Put a drop of black, and white, paint onto your palette, mix your chosen crate base colour into the black so you have approximately 3:7 base colour: Black. Paint on thin lines where you want scratches/chip.
Repeat the process, mixing your base colour into white 3:7, and paint a second fine line underneath and overlapping the dark line. The light colour simulates the bottom edge of the chip/dent being illuminated.
If you're not confident with freehand brushwork, skip to Step 7 to use just weathering and washes to complete your Crates to a high standard.

4. Everything's better with Hazard Stripes, so try some freehand!
Start with a white base coat on the areas you want hazard stripes. Raised ridges are easy because you can simply paint the raised surface and get perfect edge lines. The middle “box top” has thin strips of masking tape applied to get a good edge.
Get a solid white colour by using two thinner layers instead of one thick layer.

5. Paint a bright yellow over the white (the white ensures the yellow gets great coverage).

6. To add the stripes, use a very dark grey (almost black) and paint in the middle of where you want the stripe first (1). Next paint in further thin lines from the middle working out to the edges of the stripe (2). This gives you good control over the thickness and positioning. I use 3-4 strokes of paint per stripe. Take off the masking tape (3) to reveal your finished stripes!
In the image above, we have also painted in metallic silver on the grenades, and added highlights to the black and silver areas.

7. Now we move on to a fun part, weathering!
It's time to get some mud and dirt on! Cut a very small cube of foam (the grey stuff you get in many blister packs) and superglue it to the end of a bit of sprue, you now have your very own precision mud applicator!
Dab the sponge tool in a colour of your choice, perhaps one which fits the theme of the base the Crate will sit on, and then dab off most of the paint on a bit of tissue.
Test dabbing the sponge on your hand or pallet. You want only a very small amount of paint to come off with each dab.
Dab your chosen mud/grime colours on the boxes, focusing on areas around the bottoms, edges and hinges. Using two different colours will get a richer, more realistic effect.
You can also dab with metallic silver to get the impression of metal showing through, Try it around hinges and on hazard strip areas.
It's important not to overdo the weathering, start with a little, you can easily add more.
Finishing touches
Paint in any details like grenades, ammunition etc with the right colours.
Cover the entire model in a light brown or black wash (for example, GW devlan mud or watered down Nuln Oil). You want the wash just in the recessed areas, so remove any excess wash from flat surfaces by drying the brush and dabbing it onto areas with excessive wash.
Add Rust to metal areas if desired. We’ve used ModelMates Rust Effect, but you can get a similar effect with other products or with brown/orange/yellow paints.
The final effect:

We hope you find this tutorial useful!
Feel free to comment or email us with any questions, suggestions for future Brush Tip articles, or examples of your work where you've applied these techniques!
